Deploying an Application with Neon
In this example, we have an application connected to a serverless Postgres database provisioned on Neon.
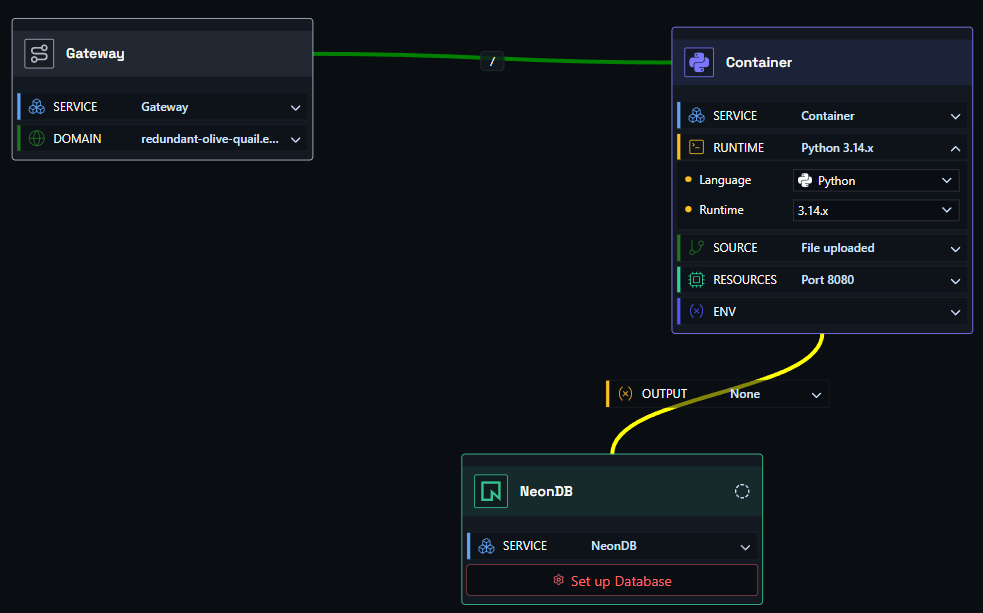
You need three components: a container node, a gateway node, and a Neon node.
- Container node - links to your source code, runs and scales your container, and holds app environment variables.
- Gateway node - where you set the DNS name for your app.
- Neon node - configures your Neon Postgres connection details and provides the output value you map into your container.
Hit deploy, and it just works.
Step One
Drag a container node, a gateway node, and a Neon node onto the canvas, then link them together.
Step Two
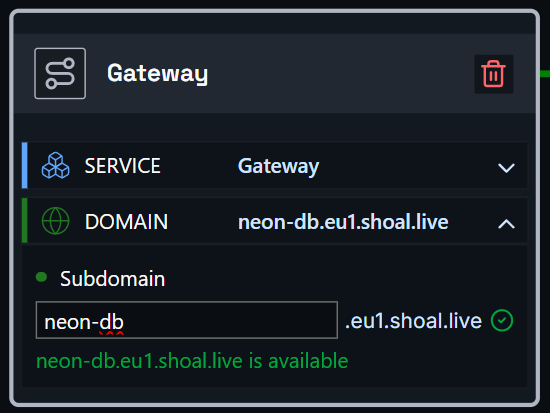
Click the gateway node to open it, expand the Domain section, and enter the URL name you want. For example, entering shopping-test will make your app available at shopping-test.eu1.shoal.live. You can also point a custom domain at this address.
Step Three
Click the container node to open it, expand the Source section, and set up your source - either a GitHub repo or a file upload. If your project includes a Dockerfile, Shoal builds from it; otherwise Shoal auto-detects your stack and builds it for you.
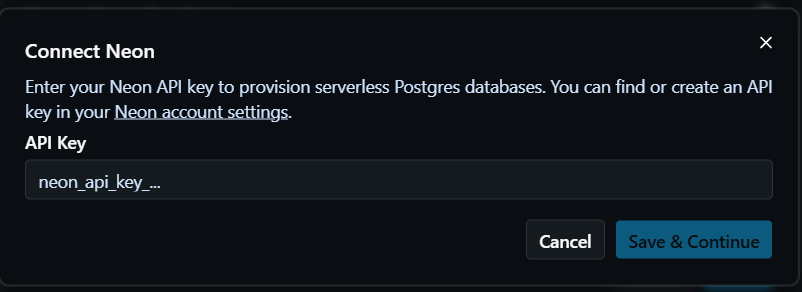
Open the Neon node and click Set up Database (or Configure / Edit if it's already initialized). If a Neon API key is not saved for the space yet, Shoal prompts you with Connect Neon first, where you enter your Neon API key. If a key is already saved, Shoal skips this step and opens setup directly.
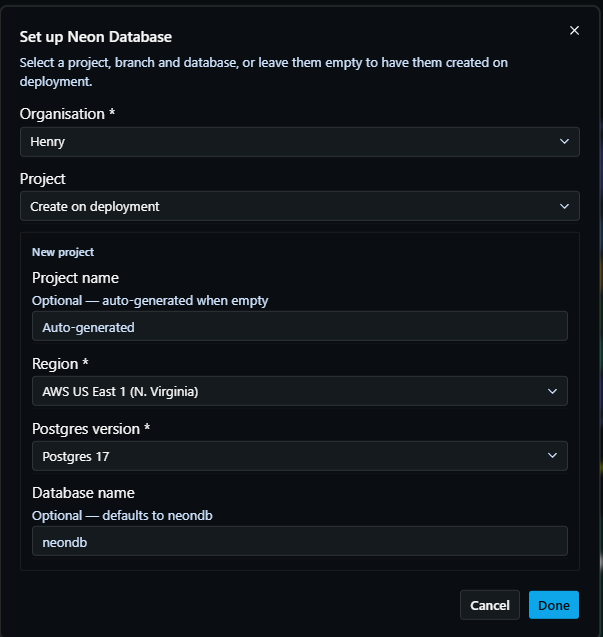
In the Set up Neon Database dialog, choose your Organisation, then either select an existing Project or choose Create on deployment.
- If you select an existing project, choose a Branch (or create a new one), a Database (or leave it to be created on deployment), and a Role (defaults to the database owner).
- If you choose Create on deployment, Shoal creates the project for you - optionally set a project name, then pick a Region, a Postgres version, and an optional database name (defaults to
neondb).
Step Four
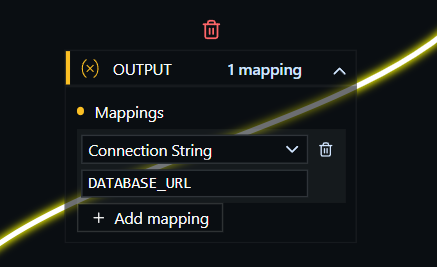
Map the Neon output connection_string to your container environment variable, usually DATABASE_URL. You can also map host and port if your app expects separate values.
You can manage environment variables from the container node's Env section, or from the environment settings page. See the environment variables guide for more detail.
Step Five
Press Deploy. You can watch the deployment in real time via the Observability menu, or by clicking the link on the deploy button.
Done
Your app is live at the address you configured - connected to Neon Postgres and running in a scalable, resilient, and protected environment.