Deploying an Application
Deploy in a few simple steps. In this example, we have an application we want to expose on the internet, with source code hosted on GitHub.
You need two components: a container node and a gateway node.
- Container node - links to your source code. Shoal builds and runs your container, scales it automatically, and keeps it resilient.
- Gateway node - where you set the DNS name (web address) you want your app to be reachable at.
Hit deploy, and it just works.
Step One
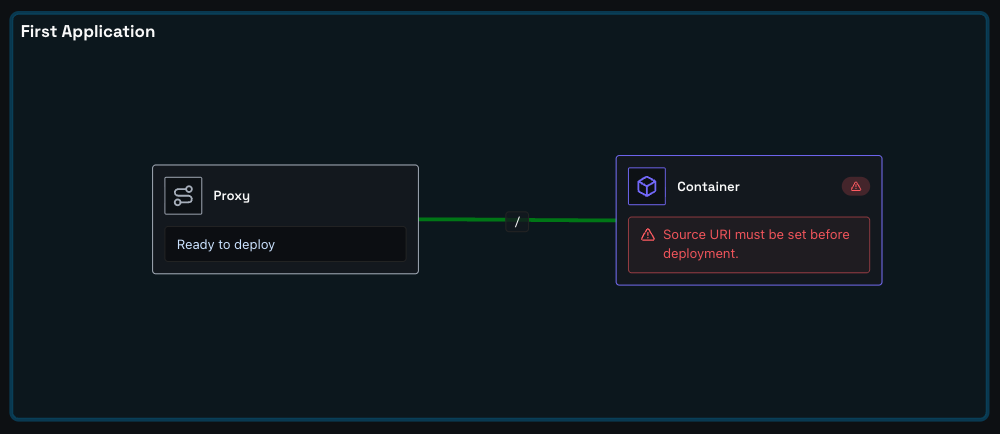
Drag a container node and a gateway node onto the canvas, then link them together. You can also add a comment box if you like.
Step Two
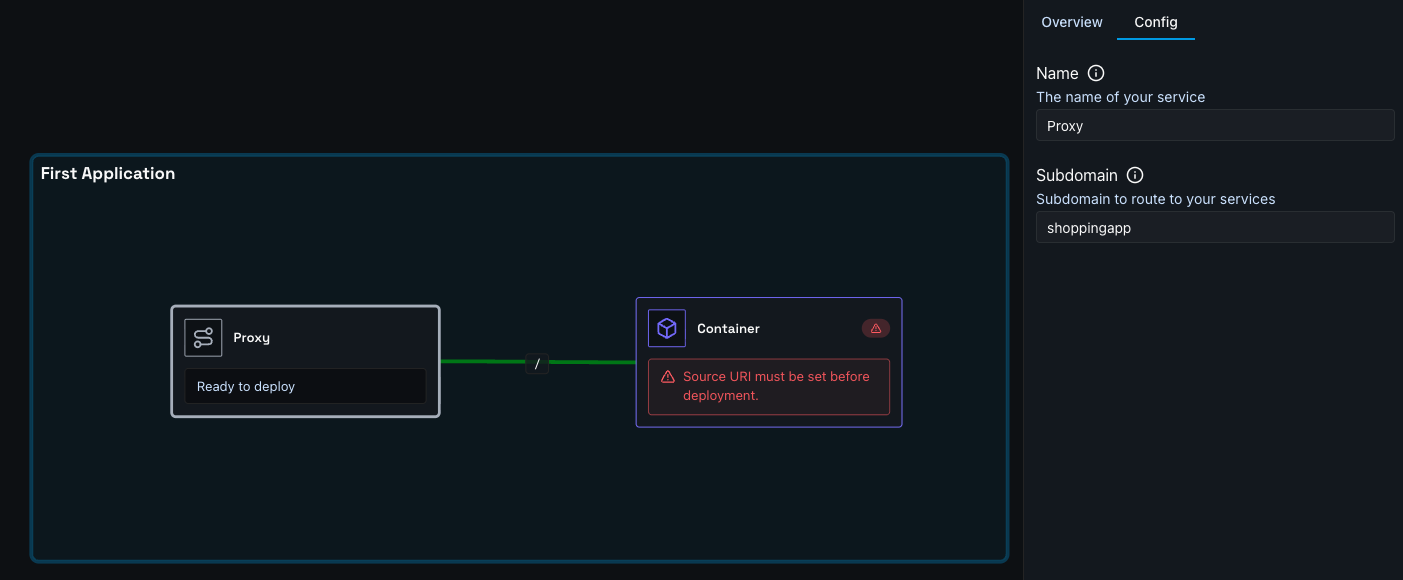
Click the gateway node to open it, expand the Domain section, and enter the URL name you want. For example, entering shopping-test will make your app available at shopping-test.eu1.shoal.live. You can also point a custom domain at this address.
Step Three
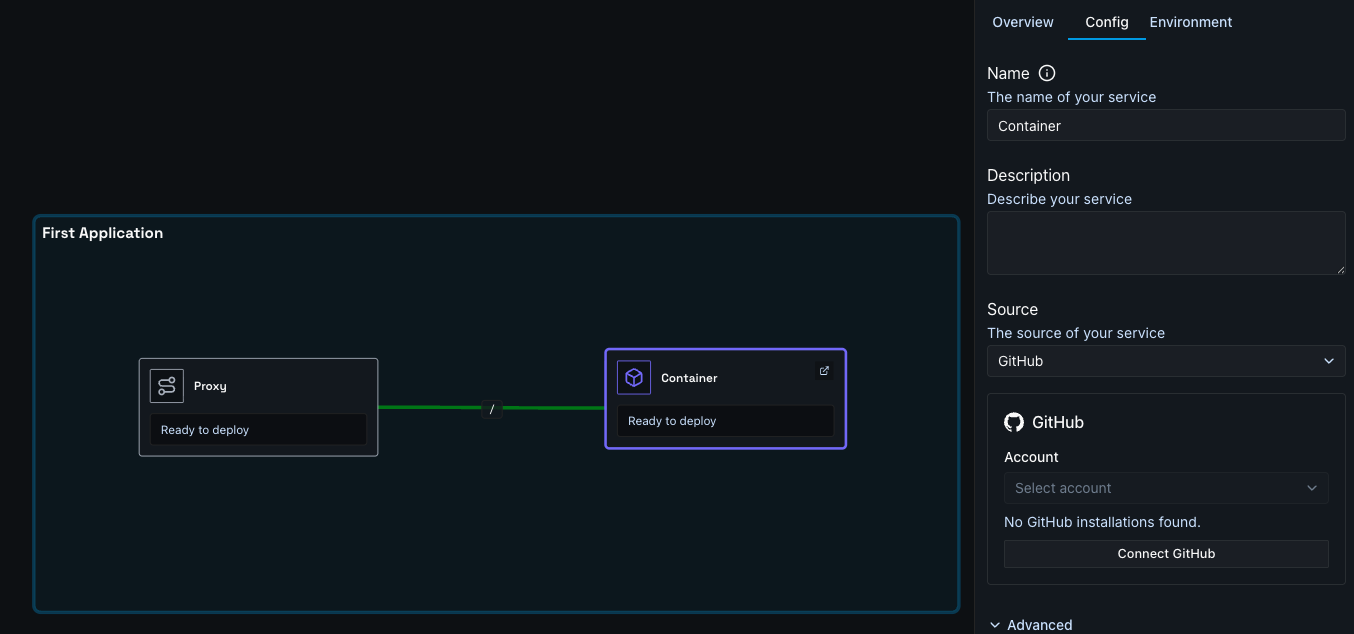
Click the container node to open it, expand the Source section, and set up your source - either a GitHub repo or a file upload. If your project includes a Dockerfile, Shoal builds from it; otherwise Shoal auto-detects your stack and builds it for you.
Step Four
Press Deploy. You can watch the deployment in real time via the Observability menu, or by clicking the link on the deploy button.
Done
Your app is live at the address you configured - running in a scalable, resilient, and protected environment.